Shelves at Last
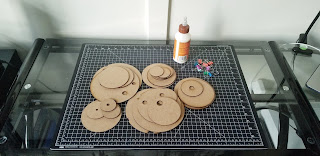
 Continuing on from my last post, I now had all my pieces and was ready to glue them all together. This was thought to be the easiest part of the entire project.
However I underestimated the process and ended up glueing several pieces the wrong way. This included all three of the bases. I was able to pry some pieces apart, sand them down and glue them again properly. I did not photo document this screw up..
Once I finally fixed/glued/filed all my pieces, I began to build the puzzles! There were many stability issues due to weight distribution. This could be mitigated during the surface modelling phase. I would simply have to rotate and adjust certain pieces so that pieces don't topple over.
PUZZLE #1
 This puzzle is the one that has its pieces holes etched on both sides. As predicted some of the deep holes start to break away causing some issues with pieces staying secure. But for the most part it turned out pretty well. This one is the 2nd hardest to solve out of the 3.
PUZZLE #2
This puzzle didn't have many problems when fabricating. It is the easiest to solve, but don't be fooled by its simplicity.
PUZZLE #3
 The poles for each puzzle fit the laser cut holes on the shelves pretty well after filing their edges a bit. All except these ones. The only difference I can think of is that these poles were printed on the TAZ while the others were printed using the Prusa. Perhaps the filament has something to do with it. Because of this I had to file the poles a bit extra, as well as file the holes on the planks.
FINAL PIECES


Comments
Post a Comment